Discord recently introduced the ability
to build custom activities
using their Embedded App SDK.
Those are usually highly interactive, real-time apps for multiple users.
Which is something that Phoenix LiveView is an excellent fit for.
Here are some reasons why I think Phoenix LiveView is a great choice for building realtime Discord activities:
Discord uses iframes to run activities, and Phoenix is optimized for rendering HTML.
It is built on top of websockets and optimized for real-time applications.
It has great built in support for pub-sub using Phoenix PubSub and Channels.
You can easily scale games across Erlang clusters to minimize latency between clients and servers.
It’s a joy to use liveview. Problems like realtime data synchronization (which can be quite hard in traditional FE stacks like React + React Query) are usually trivial to solve using built-in Phoenix and OTP primitives. This is in my opinion the best part about Elixir and Phoenix in general.
I will walk you through the process of creating such an activity, using a simple game as an example. Your activity can be something entirely different though, as the project setup and the integration with Discord Embedded App SDK are not specific to building games.
Prerequisites
You’ll need a few things before you start the development:
A way to expose your local port to the internet. I recomment using either cloudflared , ngrok or tunnelto.dev. It doesn’t really matter which one of these you’ll use, or you can raw dog tunnels over SSH on your own box, if that’s your thing.
Working Elixir compiler - if you don’t have it installed yet, I recommend using this asdf plugin. It’s, in my opinion, the easiest way to install elixir and erlang.
Phoenix CLI installed (mix phx.new) - see the hex docs for installation.
Node.js + npm installed - you’ll need this later on when installing Discord’s SDK.
Registering the Discord Application
I will assume that you have an existing Discord account, however I will try to assume no prior knowledge of how Discord API and integrations work.
Summary
If you already know how to setup a Discord app, just make sure to safely store your app’s OAuth2 credentials somewhere and configure Activity URL mapping to exposed local tunnel on port 4000.
Start by heading to https://discord.dev which will redirect you to the Discord developer portal. It might ask you to sign into your Discord account before entering the Developer center.
Creating a new Discord application
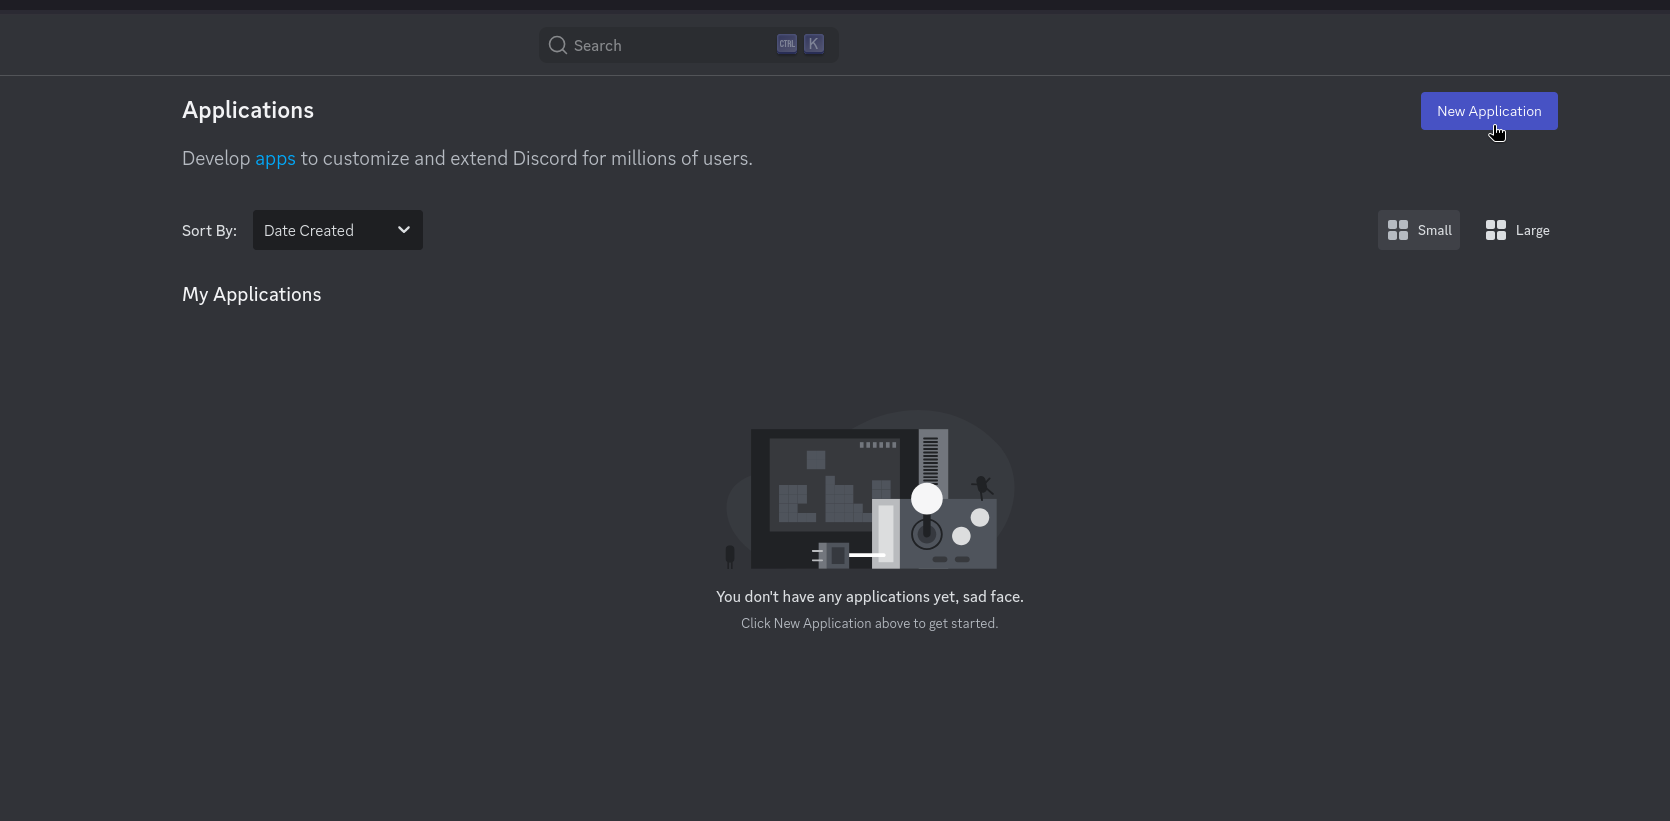
If you navigate to https://discord.com/developers/applications you should see a portal for registering applications. We’ll need to register an application and configure it as the activity.
First click the New Application button in the top right corner:
Then fill out your application’s name and check that you agree with Developer TOS and policy. If this is your first application, I would suggest actually reading them, there are few things that can surprise you later on.
Configuring the application
There are few things that you need to configure to be able to use the activity.
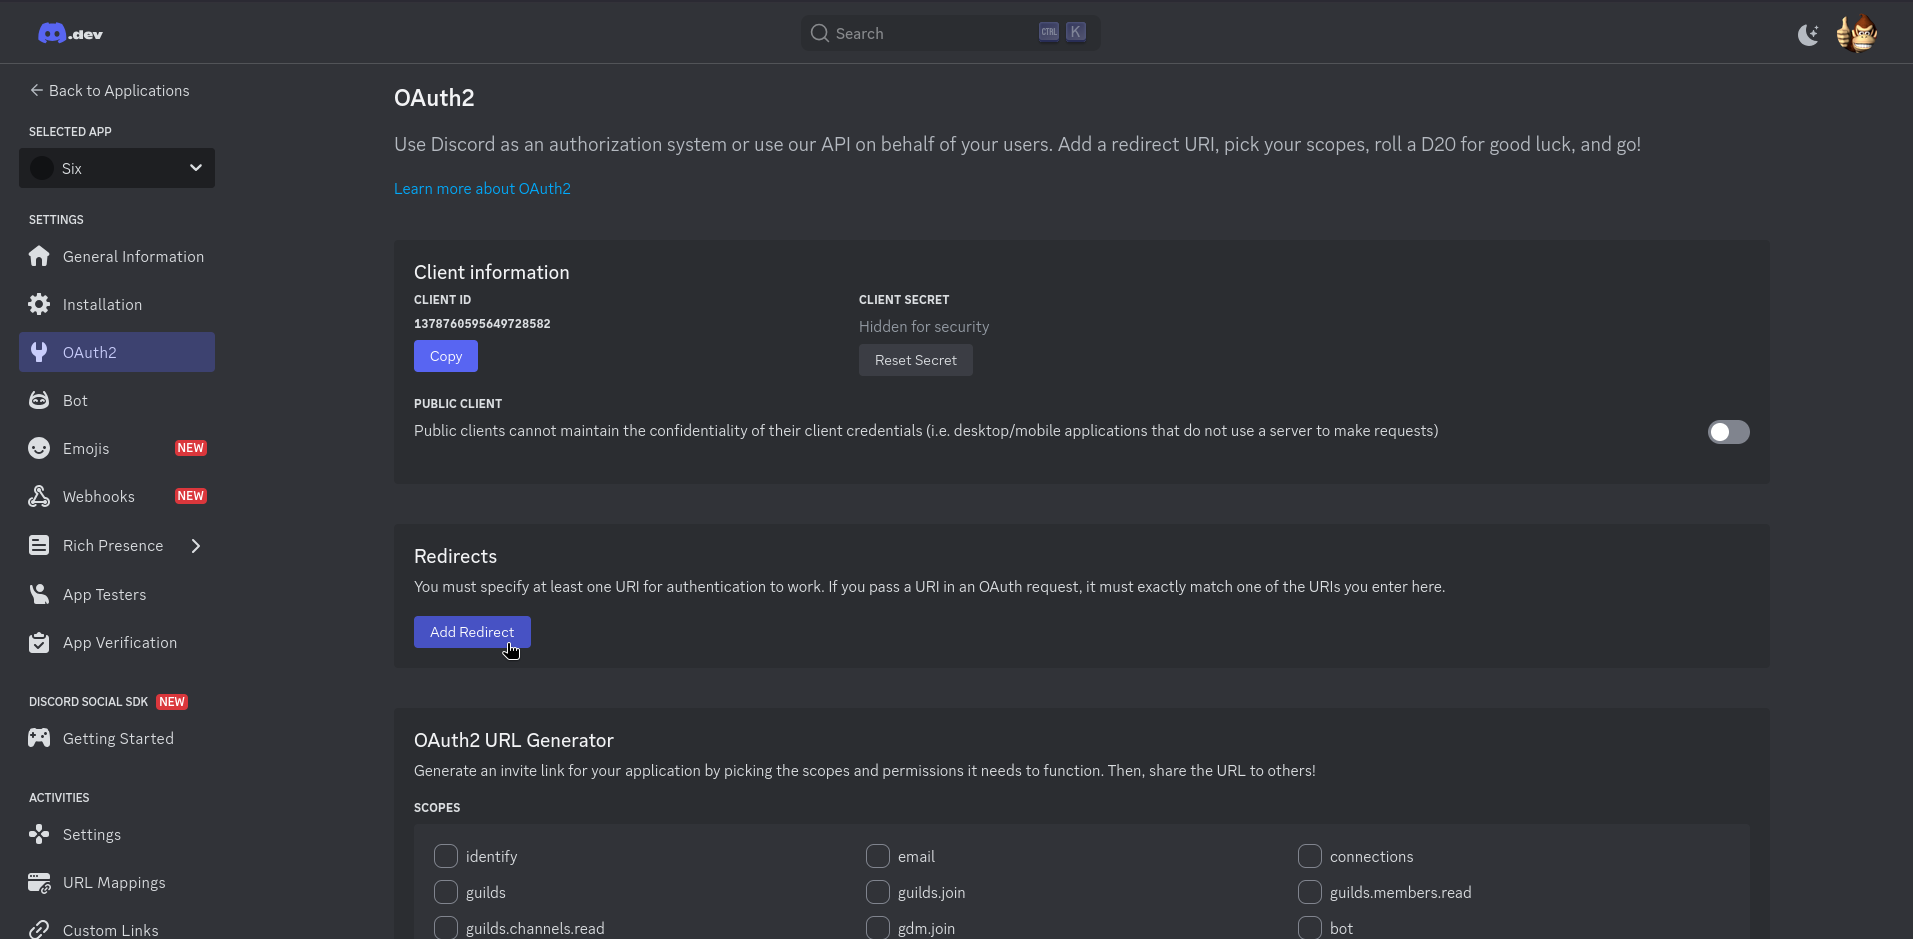
First is the OAuth2 Redirect. Even though the activity won’t use custom OAuth login page etc, there needs to be at least one redirect URI. Discord briefly mentions this in the getting started activity docs, but it took me some time to figure this one out.
Navigate to the OAuth2 section and click Add redirect:
Fill in http://127.0.0.1 and then click Save changes:
The redirect URI input field should turn green and that means that the redirect is registered and valid.
Next, copy the Client ID and then click on Reset Secret button in the top section. Store those somewhere safe, you will need them later when handling user authentication.
Warning
Don’t store Client Secret in the source code of your app. Even if your repository is private, this is a bad practice! Github will automatically contact Discord via their secret scanning functionality and the secret will be automatically revoked if you commit it into a repository.
After setting up OAuth it’s time to configure the Activity URL mapping.
Note
You can read more about URL mapping here, but the TLDR is that Discord spins up a “proxy” website over at https://[your apps Client ID].discordsays.com, which is displayed as the activity iframe in the Discord client when the activity is launched.
Now it’s the time to open a tunnel to the local port, that you’ll later use to view, debug and build your application. As an example, here’s the command to run when using cloudflared with quick tunnels:
cloudflared --url localhost:4000
After running the command, a *.trycloudflare.com URL is printed in the output (most of the actual output is omitted here).
INF +-------------------------------------------------------------+
INF |  Your quick Tunnel has been created! Visit it at:           |
INF |  https://vote-taylor-confusion-scheduling.trycloudflare.com |
INF +-------------------------------------------------------------+
This is the URL that you’ll need to enter in the Activities > URL Mappings settings:
After pasting the URL, don’t forget to click Save Changes in the confirmation dialog.
We won’t need to enter any additional URL Mappings, as all communication with the backend will be kept in the app using Phoenix Channels and the built-in sockets.
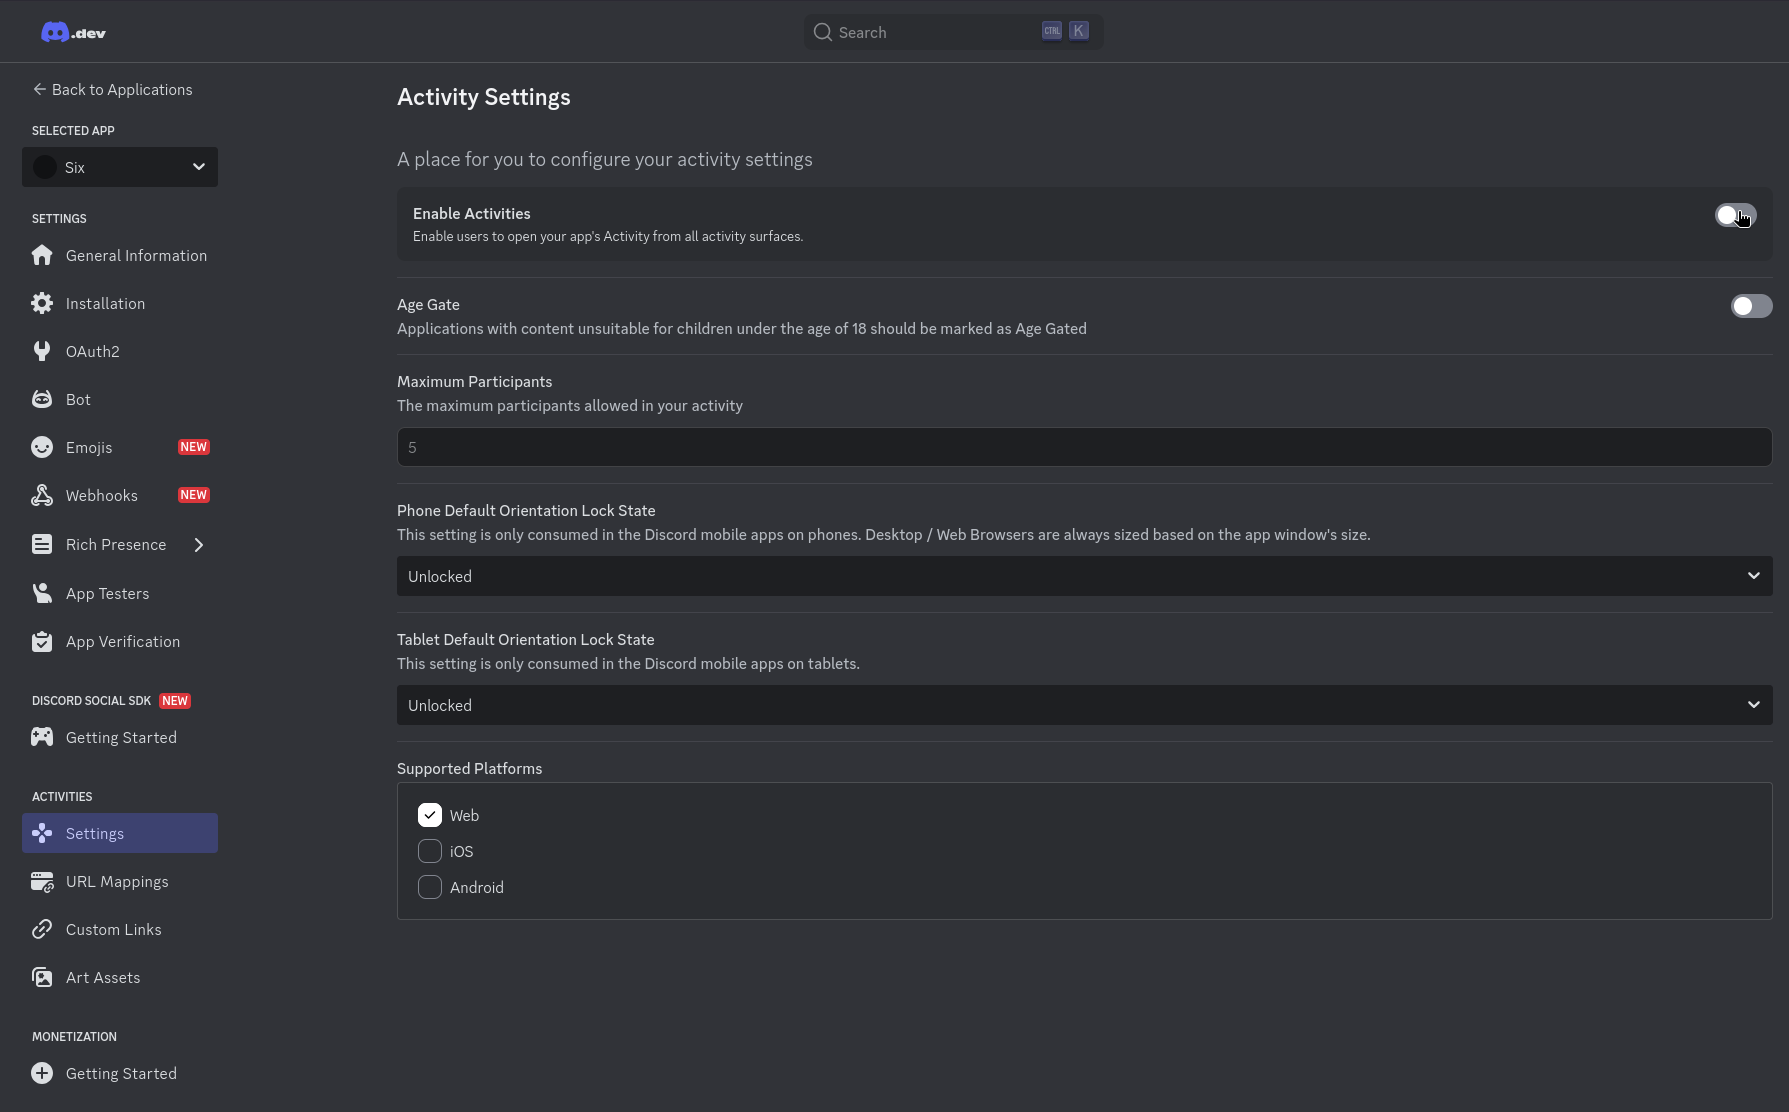
After configuring the URL mapping head over to Activites > Settings and click on the Enable Activities toggle:
After clicking on the toggle a modal will appear, confirm the entry point creation and you’re all set up!
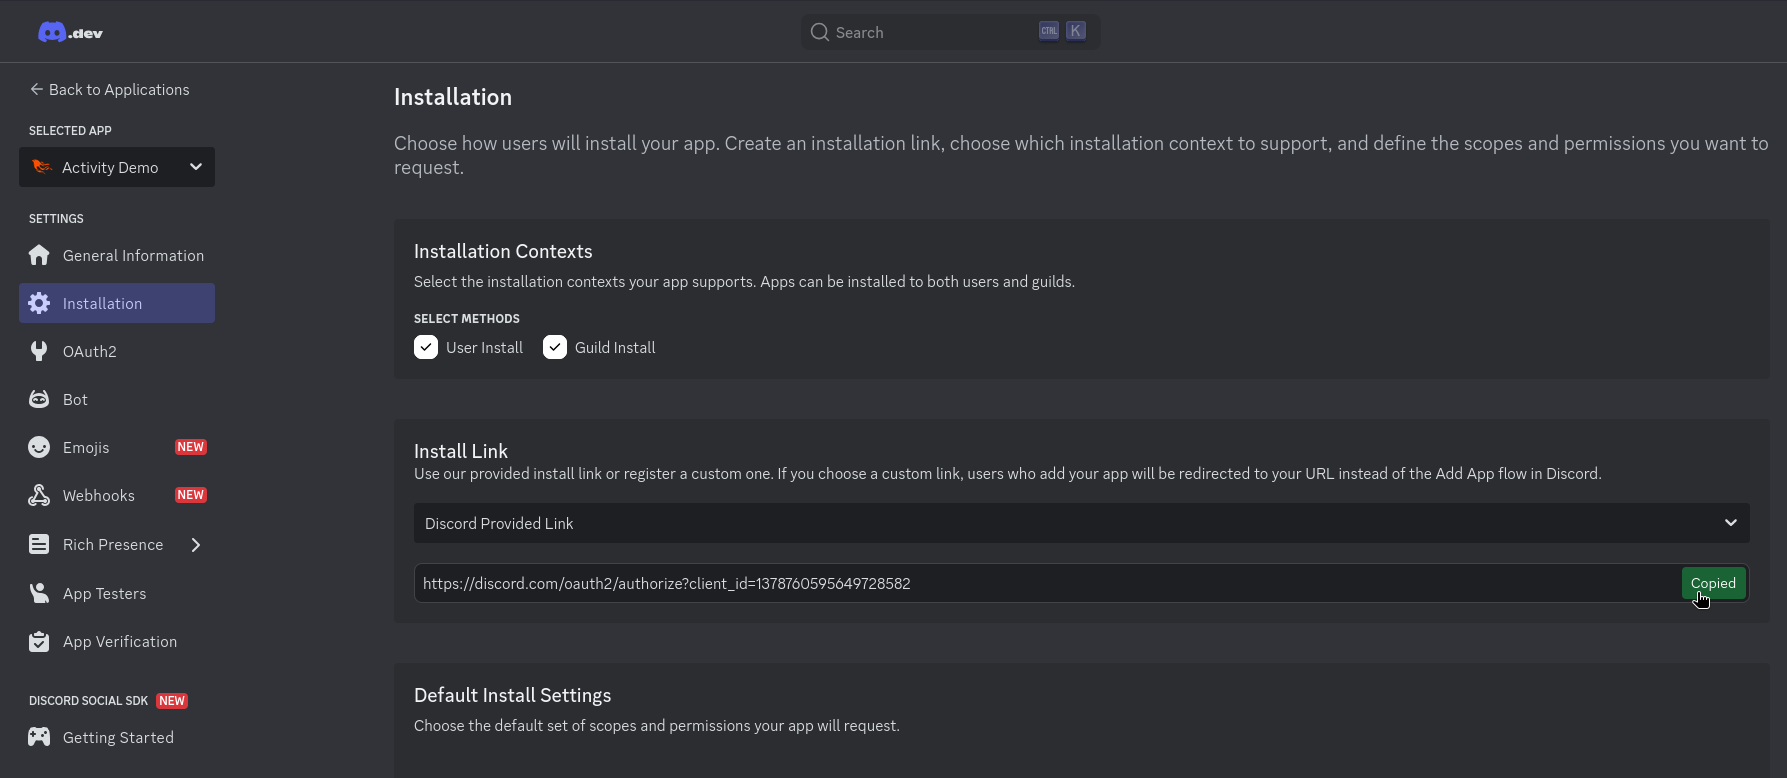
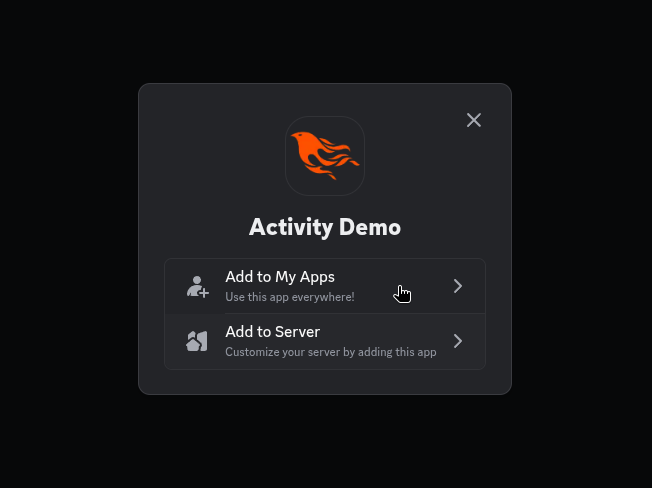
Finally you’ll need to install the app so that you can launch it from within Discord client. Open the Installation page, and copy the Install link from there:
After visiting the copied link, click Add to My Apps and you’ll be able to launch the activity in any channel.
Warning
When using the server installation method or launching via My Apps, make sure that the target server has < 25 members. This is a requirement set by Discord and unless your app gets verified via App Verification, you won’t be able to launch it in Servers with more than 25 members.
Setting up the project
First you’ll need to create a new Phoenix project. If you haven’t already, first check the installation documentation of Phoenix, and then use the phx.new command to setup the app.
In this example I won’t be using the database (and you might not need it too) - all the games in this example are ephemeral and stored in-memory. If you need a database, just omit the --no-ecto flag and alternatively configure the underlying database engine and options like binary IDs.
To create the Phoenix application use a command, similar to the following (read the docs and use whatever flags best suit your usecase):
The project will be created by the Phoenix CLI and it will also automatically install and compile the hex dependencies.
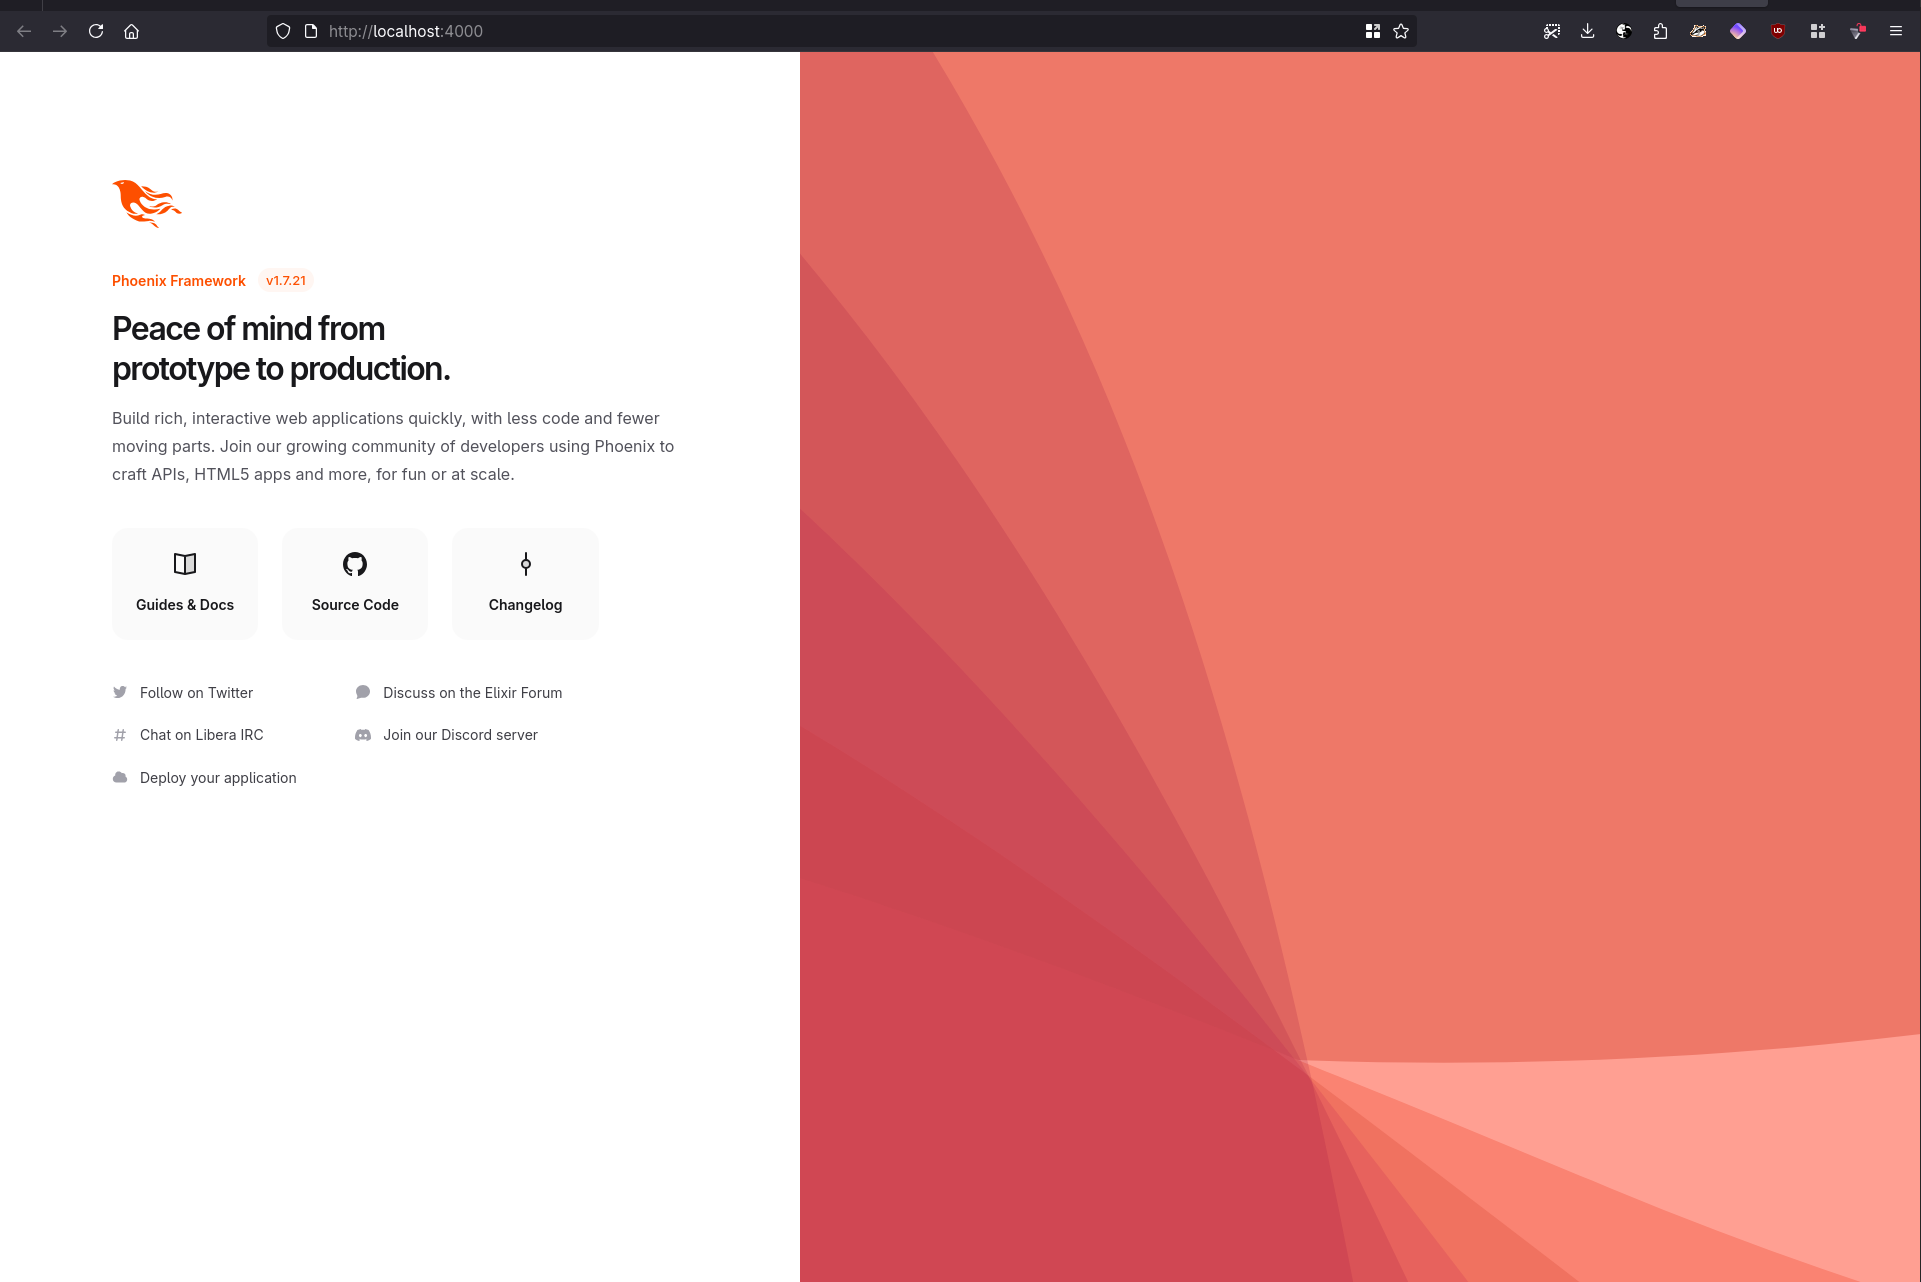
After the installation completes, run mix phx.server and open localhost:4000 in your browser. You should see the familiar Phoenix welcome screen:
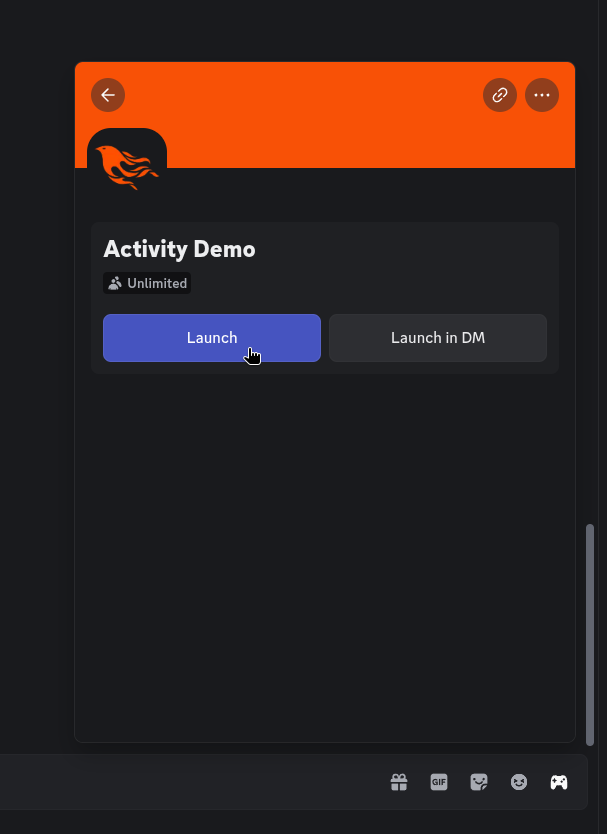
If you configured the URL mapping correctly, you should be able to launch the activity within Discord. Launch the app using Activity button in the app:
After the first launch, Discord will warn you that this is the first time you’re launching a private app, but fear not, click Continue and the activity should get launched.
Important
Here comes the catch!
Your activity will NOT work right away. You’ll see a blank white screen.
You might ask why is that and the answer is quite simple. By default, Phoenix sets some security related headers out of the box. This is a good security practice for traditional web apps, but will cause the blank white screen when used in Discord.
The root cause of this issue is the X-Frame-Options header set by Phoenix to SAMEORIGIN. You can read a bit more about the header on MDN, but the important part is that the value set by Phoenix doesn’t allow other pages (in this case the Discord client) to embed your app.
There are some additional limitations like Discord’s CSP (Content Security Policy) - another security related HTTP header, you can read more about CSP on MDN and on how Discord enforces the usage of proxies to protect its users in the Discord developer documentation.
Making Phoenix work with Discord’s infrastructure
In this section I will go into the process of setting up things inside Phoenix to make it work with Discord’s CSP and iframe limitations.
Important
In this chapter I will be removing some important security defaults in Phoenix in order to make it work with Discord’s proxy mechanism. It is important that you know what you’re doing.
For example, disabling CSRF (cross site request forgery) is an absolute no-go when using forms in a traditional web app. It is OK to disable it if you’re either using API keys or a sandboxed environment with no forms/user actions outside LiveView (which internally uses tokens to establish the websocket/longpoll connection).
Sandboxed iframe environment
To enable rendering inside Discord’s iframe, you need to remove the :put_secure_browser_headers plug middleware that is configured in the application router (router.ex) under the :browser pipeline:
# lib/activity_demo_web/router.ex defmodule ActivityDemoWeb.Router do use ActivityDemoWeb, :router pipeline :browser do plug :accepts, ["html"] plug :fetch_session plug :fetch_live_flash plug :put_root_layout, html: {ActivityDemoWeb.Layouts, :root} plug :protect_from_forgery- plug :put_secure_browser_headers end
Another issue caused by the Discord’s proxy is that custom cookies doesn’t work, therefore CSRF cannot be passed in session and both CSRF and Session need to be disabled.
Those are both configured in the same file as secure headers:
# lib/activity_demo_web/router.ex defmodule ActivityDemoWeb.Router do use ActivityDemoWeb, :router pipeline :browser do plug :accepts, ["html"]- plug :fetch_session- plug :fetch_live_flash plug :put_root_layout, html: {ActivityDemoWeb.Layouts, :root}- plug :protect_from_forgery end
Additionally, session needs to be disabled in the Phoenix LiveView socket configuration.
This configuration can be found in the endpoint.ex file:
# lib/activity_demo_web/endpoint.ex defmodule ActivityDemoWeb.Endpoint do use Phoenix.Endpoint, otp_app: :activity_demo- # The session will be stored in the cookie and signed,- # this means its contents can be read but not tampered with.- # Set :encryption_salt if you would also like to encrypt it.- @session_options [- store: :cookie,- key: "_activity_demo_key",- signing_salt: "6azvVYFB",- same_site: "Lax"- ] socket "/live", Phoenix.LiveView.Socket,- websocket: [connect_info: [session: @session_options]],- longpoll: [connect_info: [session: @session_options]]+ websocket: [connect_info: []],+ longpoll: [connect_info: []] # Serve at "/" the static files from "priv/static" directory. # # You should set gzip to true if you are running phx.digest # when deploying your static files in production. plug Plug.Static, at: "/", from: :activity_demo, gzip: false, only: ActivityDemoWeb.static_paths() # Code reloading can be explicitly enabled under the # :code_reloader configuration of your endpoint. if code_reloading? do socket "/phoenix/live_reload/socket", Phoenix.LiveReloader.Socket plug Phoenix.LiveReloader plug Phoenix.CodeReloader end plug Plug.RequestId plug Plug.Telemetry, event_prefix: [:phoenix, :endpoint] plug Plug.Parsers, parsers: [:urlencoded, :multipart, :json], pass: ["*/*"], json_decoder: Phoenix.json_library() plug Plug.MethodOverride plug Plug.Head- plug Plug.Session, @session_options plug ActivityDemoWeb.Router end
After launching the DIscord activity again, we can see it renders in the iframe, however, there is an error that :flash is not present in the Plug connection assigns. This problem arises from the removal of the :fetch_live_flash middleware (which depends on session).
To fix this issue, simply remove the invocation of flash_group component from app.html.heex layout and home.html.heex template:
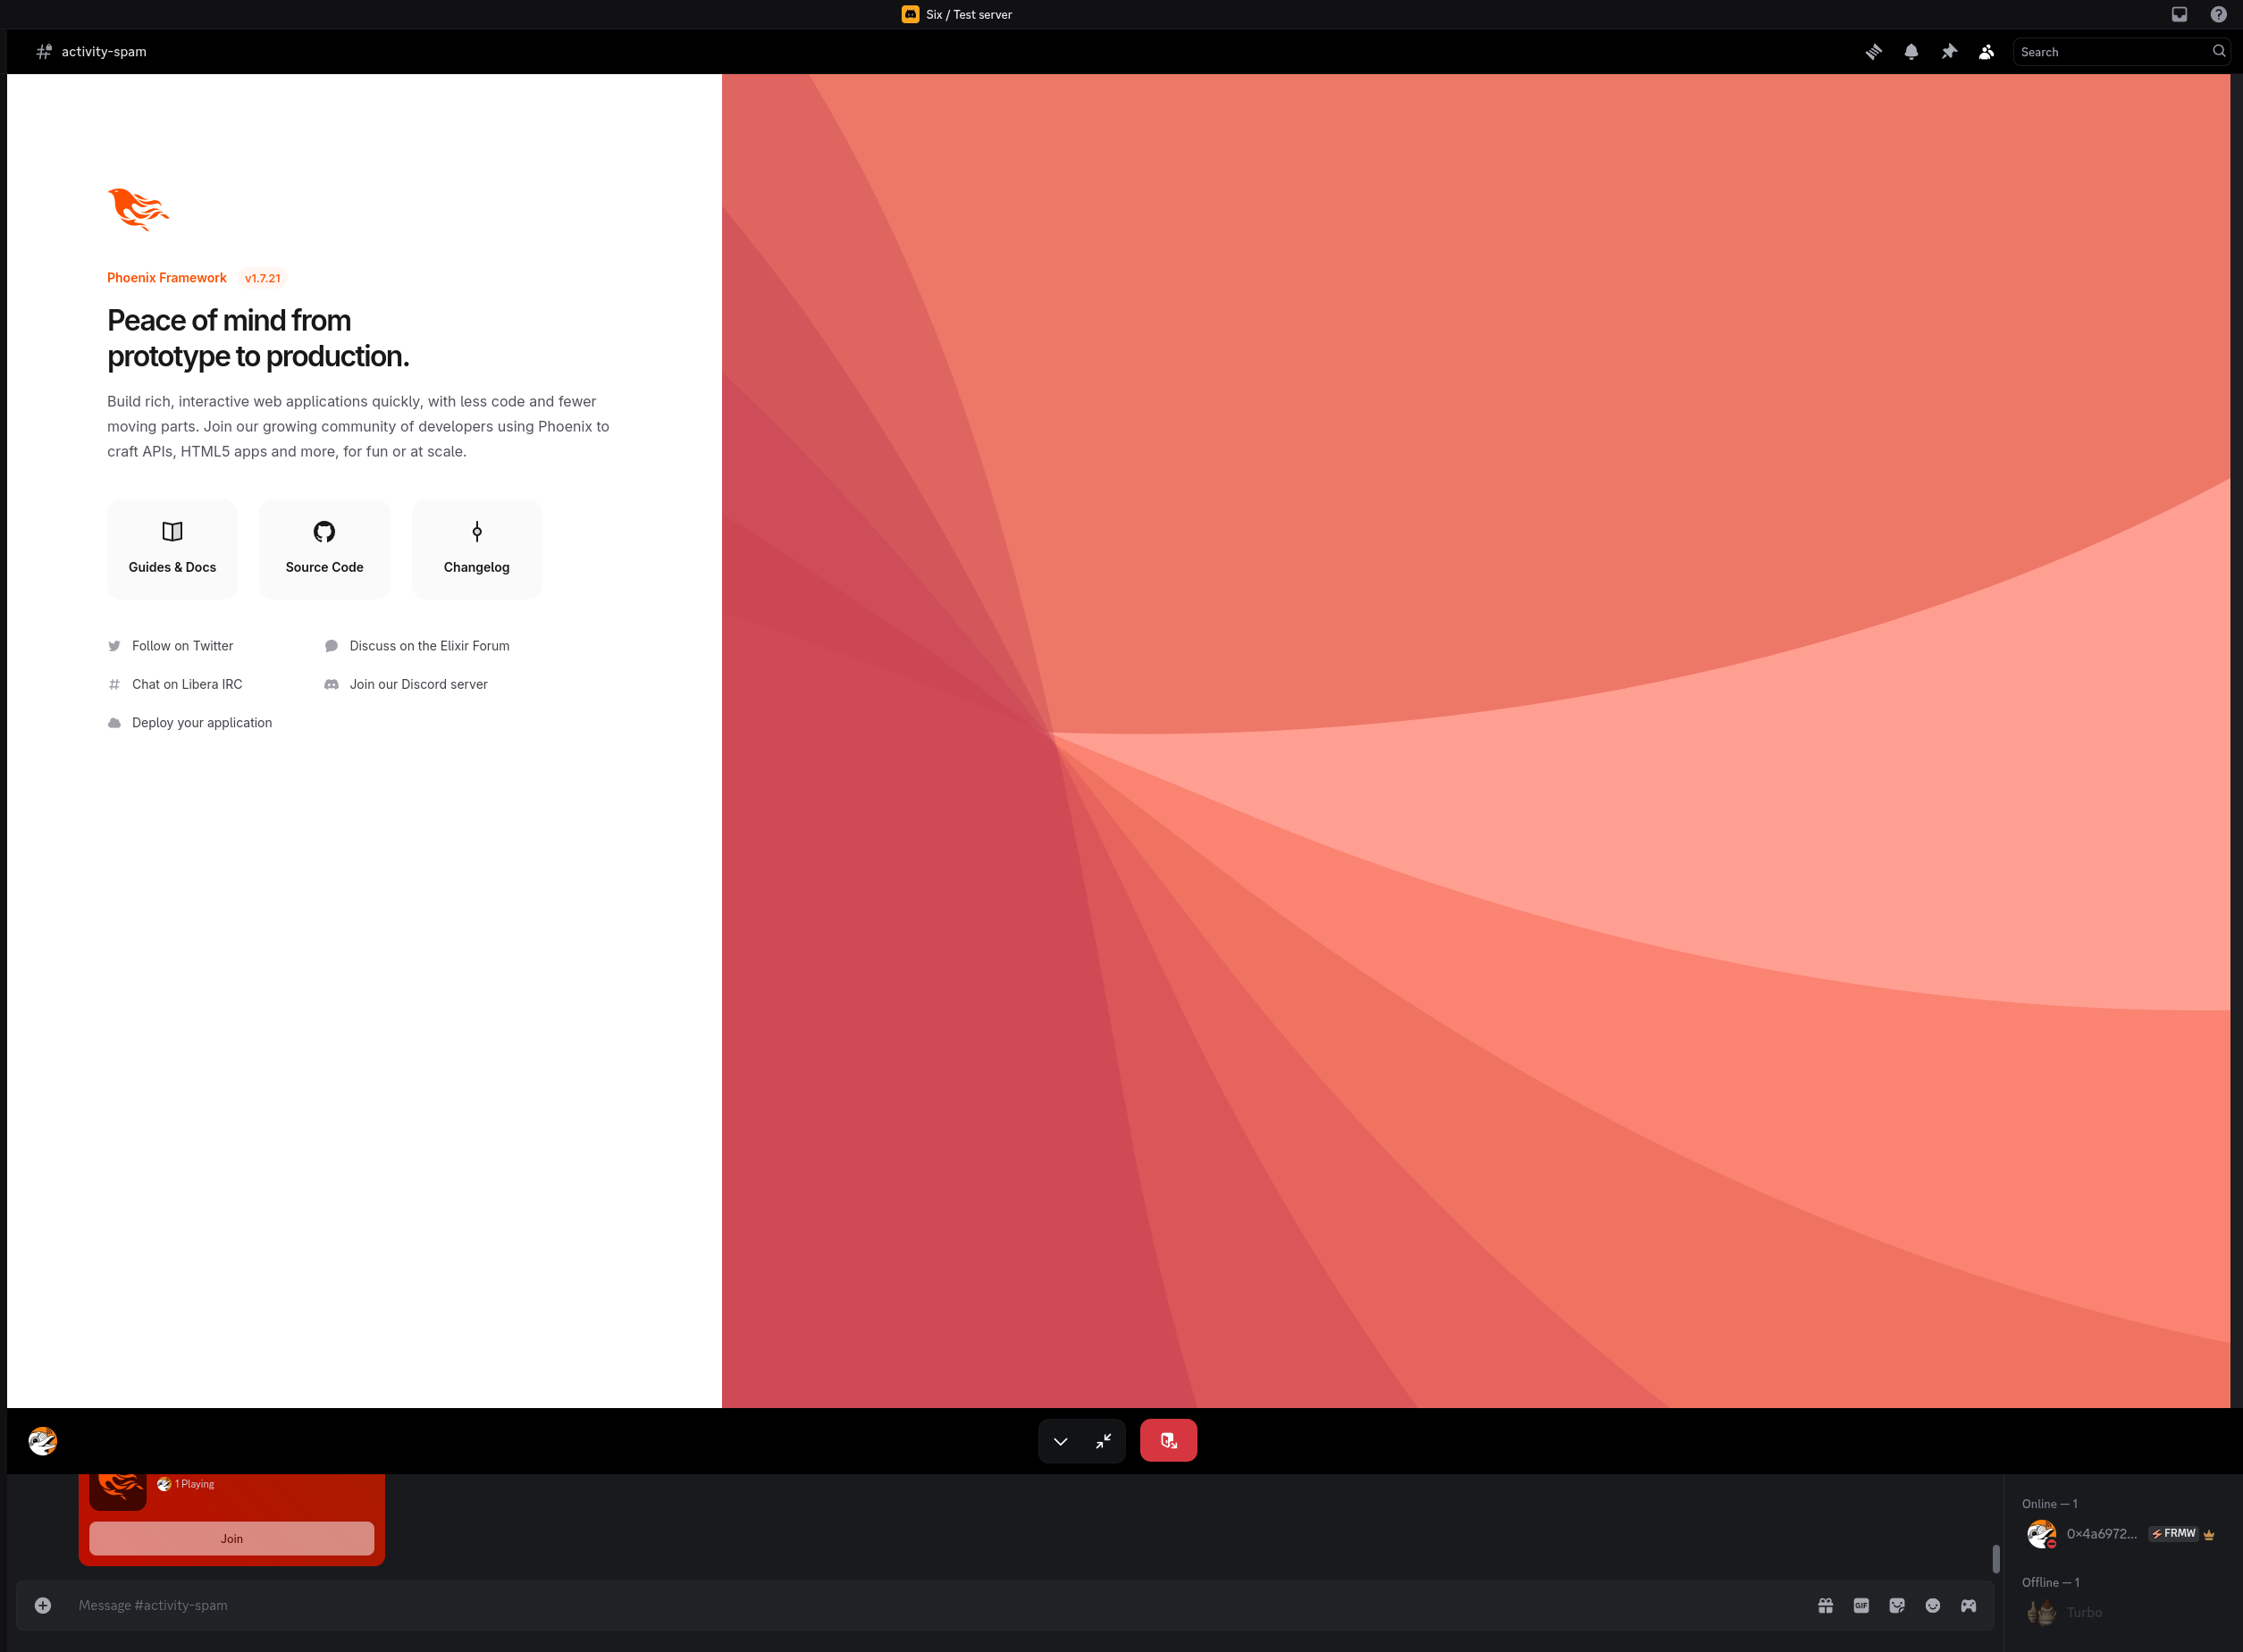
Now restart the app (by invoking mix phx.server again) and you’ll see the Phoenix landing page inside the Discord activity!
Hint
But wait, something is not quite right!
If you have worked with Phoenix before, you might have noticed something weird. The app needed to be restarted in order to see the changes! That’s not the fancy Elixir fashion of doing things. Let’s find out why the built-in hot reloading doesn’t work!
Fixing hot reload
The answer to why hot reloading doesn’t work is Discord’s Content Security Policy that is sent among other headers when visiting the activity iframe!
In order to protect its users, Discord enforces all iframes to be loaded via the /.proxy path, which strips out all headers and stuff like IP address of the user. A quick explanation why this matters:
Info
A quick intro into how Phoenix’s built in hot reload works:
First an <iframe> is rendered on the page via plug registered in endpoint.ex (Phoenix.LiveReloader)
This iframe then establishes a Phoenix socket connecting to the code server and after each file change, an event is transmitted over this socket which then updates the rendered HTML / or “reloads” the page.
To make the code reloading work, we need to ensure 2 things:
The <iframe> source for hot reloading is loaded via the /.proxy/ path
The socket opened in this frame needs to be also routed via /.proxy/
Here’s how to do it:
First we need to setup the src attribute of the iframe. The default path is /phoenix/live_relod/frame. Phoenix allows for customization via the Mix configuration of iframe attrs.
As code reloading is only active in dev environment, the configuration is in the dev.exs config file.
You don’t need to change anything on the socket side itself, because Discord’s proxy automatically removes the /.proxy/ prefix from the path, so routing on the backend side works exactly same as before.
Fixing Phoenix LiveView’s socket path
The last change to make the whole thing work together with discord’s proxy is to prefix Phoenix LiveView socket path with /.proxy and remove the passed CSRF token, which was previously disabled.
This is the moment where you need to first step out of the shiny Elixir land and enter the realm of JavaScript wastelands. Let’s open assets/js/app.js in your favorite text editor.
Here, we need to change 2 things:
- let csrfToken = document.querySelector("meta[name='csrf-token']").getAttribute("content")- let liveSocket = new LiveSocket("/live", Socket, {+ let liveSocket = new LiveSocket("/.proxy/live", Socket, { longPollFallbackMs: 2500,- params: {_csrf_token: csrfToken}})
This removes passing of the CSRF token when establishing LiveView connection and additionally, this changes the /live path (which would fail on CSP policy) to a proxied one that passes without any issues.
Summary
Your project is now setup to work properly in the Discord’s sandboxed environment!
The app can be correctly viewed in an iframe
All iframe and Phoenix socket requests are routed via the /.proxy path
Code reloading works without issues
LiveView connections are configured not to pass the CSRF token when connecting
Next, we’ll take a look on how to integrate Discord SDK with LiveView using LiveView hooks.
Integrating Discord SDK with LiveView
Now that the activity is up & running, let’s start integrating our code with Discord’s SDK.
First, make sure that you have Node.js and npm installed by running the following commands:
node -vnpm -v
Both commands should ideally return an up-to-date version number.
To install the Discord Embedded App SDK, head over to the assets folder and run this command:
cd assetsnpm install --save @discord/embedded-app-sdk
You should see two new files appear in the assets folder: package.json and package-lock.json. Alongside those two files, there should be a node_modules directory as well.
Making Discord SDK talk with LiveView
Now comes the tricky part. How can we integrate the installed Javascript SDK with LiveView?
The answer to this problem lays in LiveView client hooks.
This LiveView extension point allows you to define javascript functions that are invoked in various stages of the component’s lifecycle.
For this activity, I will be implementing a login hook that invokes the AUTHORIZE RPC command via the SDK, which will be called when the LiveView is mounted.
While this flow works really well for client driven apps that rely heavily on the SDK, it is not the greatest fit for LiveView, where the only requirement is to get the current user information in order to join the activity.
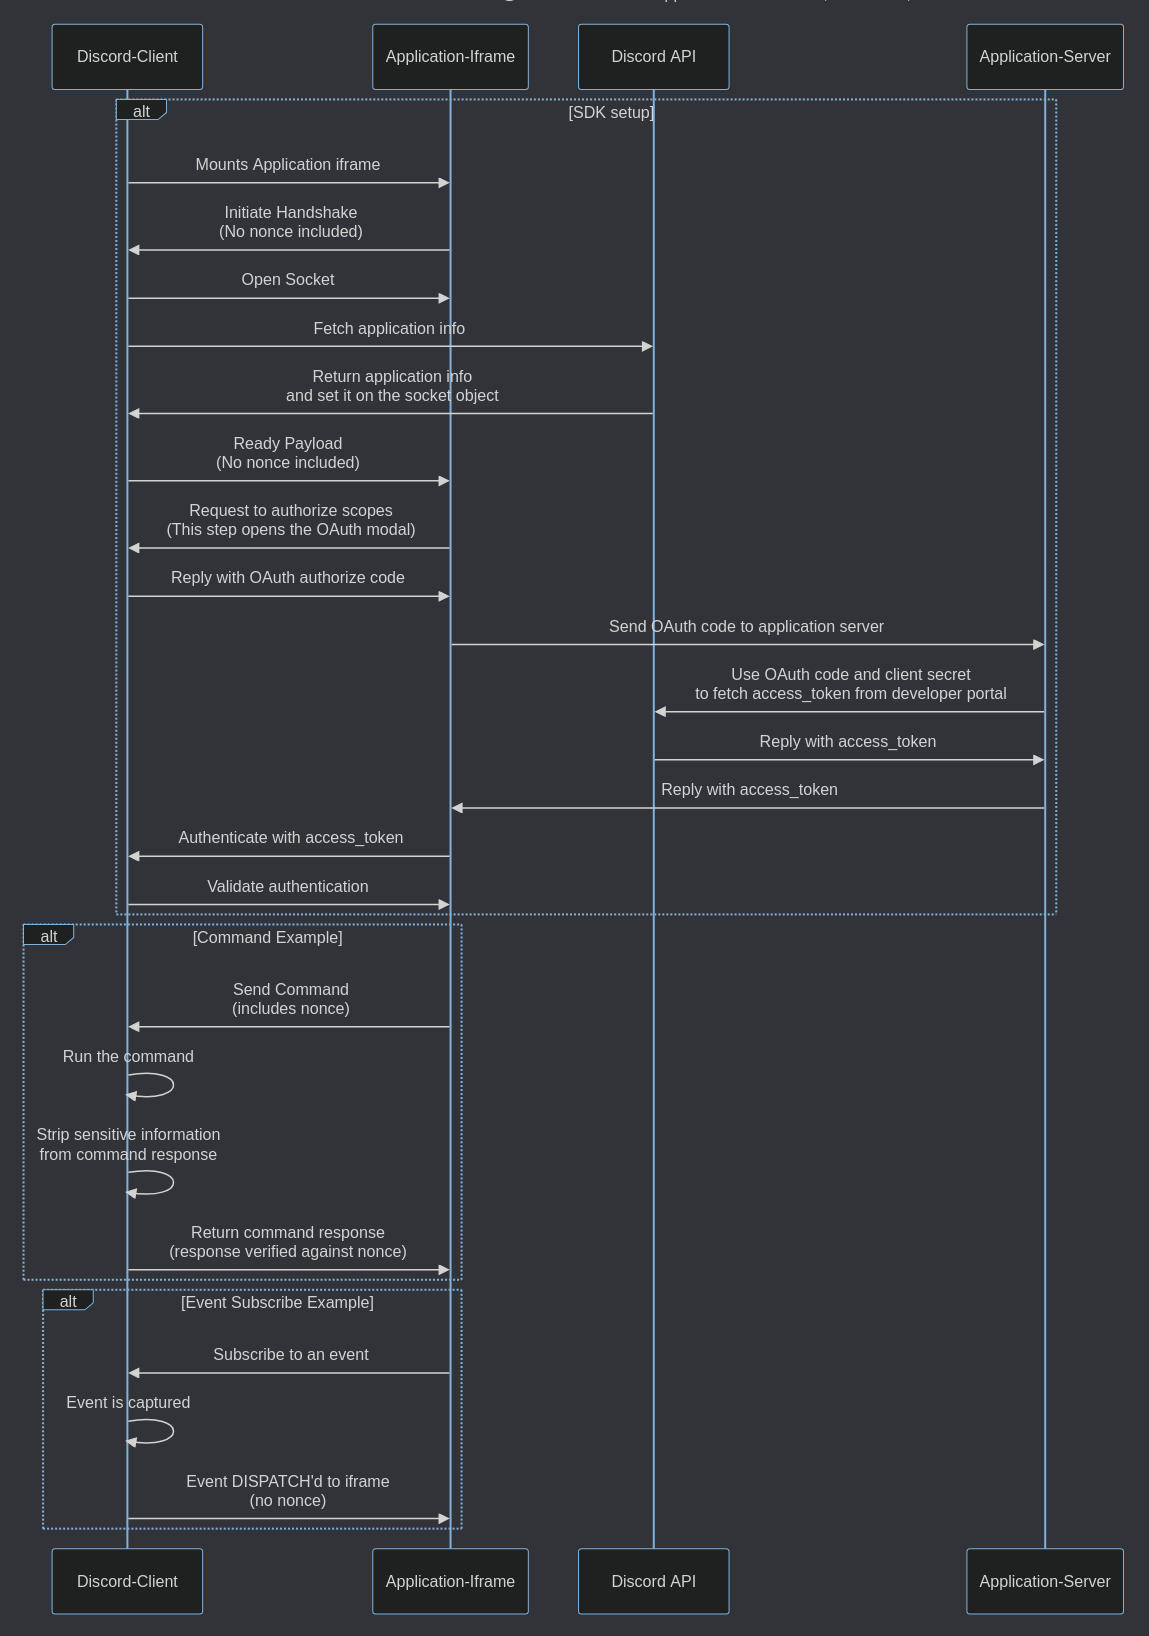
Our implementation will use the following flow instead, which better fits the need:
sequenceDiagram
	Activity LiveView->>Discord SDK: authorize call (via phx-hook)
	Discord SDK->>Discord Client: AUTHORIZE RPC command
	Discord Client->>Discord SDK: Auth code
	Discord SDK->>Activity LiveView: Auth code
	Activity LiveView->>Activity LiveView: event (login_with_auth_code)
	Activity LiveView->>Discord API: Auth code
	Discord API->>Activity LiveView: Access token
	Activity LiveView->>Discord API: Get user info (with access token auth)
	Discord API->>Activity LiveView: User info
	Activity LiveView->>Activity LiveView: Update state (store user info)
Let’s implement that!
First you’ll need to register a new hook called DiscordAuth, which will call the Discord SDK and dispatch the login_with_auth_code event.
Navigate over to assets/js/app.js and add the following code snippet:
What this code does is that it initializes the Discord SDK (using the passed Client ID - I’ll go into how this is done later) and then calls the authorize command. Finally, when the authentication flow is confirmed by the user, a login_with_auth_code LiveView event is pushed to the server, together with the received auth code as params.
The last thing that’s required in app.js is to register the hook to the LiveView socket, so that it recognizes and correctly calls the hook for components with the phx-hook attribute.
let liveSocket = new LiveSocket("/.proxy/live", Socket, { longPollFallbackMs: 2500,+ hooks });
Note
The syntax used here is JavaScript shorthand for the following:
{ hooks: hooks }
Now the only thing that’s left to do is to use this hook.
Let’s start with defining the game LiveView, and setting up some default state, where the player is nil. Create a new file at lib/activity_demo_web/live/game_live.ex. Now add the following
defmodule ActivityDemoWeb.GameLive do use ActivityDemoWeb, :live_view def mount(%{"launch_id" => game_id}, _session, socket) do socket = socket |> assign(:player, nil) |> assign(:game_id, game_id) {:ok, socket} end def render(assigns) do ~H""" <h1>Hello world</h1> <h2>You're connected to game {@game_id}</h2> """ endend
There’s quite a lot going on so let’s break it down:
First we use ActivityDemoWeb, :live_view, this internally calls the __using__ macro of the ActivityDemoWeb module, which provides the required setup in order to make the LiveView work.
Then we define a mount function, that handles when the LiveView is opened in the browser and mounted for the first time.
You can see that it pattern matches on the params function argument, and extracts a launch_id parameter, which is provided by Discord when launching the activity.
Next a nil value is assigned as :player key to the LiveView socket
And finally the extracted launch_id is stored as :game_id to the socket
Finally, a render function is defined which only shows the assigned Game ID for now. We’ll later replace this function with a separate .heex file for better maintainability.
Tip
If you’re not yet familiar with how LiveView lifecycle works, I would highly recommend reading the Hexdocs introduction page. The Phoenix team did a great job introducing LiveView there!
Next, replace the default PageController route with the newly created LiveView:
# lib/activity_demo_web/router.ex defmodule ActivityDemoWeb.Router do use ActivityDemoWeb, :router pipeline :browser do plug :accepts, ["html"] plug :put_root_layout, html: {ActivityDemoWeb.Layouts, :root} end pipeline :api do plug :accepts, ["json"] end scope "/", ActivityDemoWeb do pipe_through :browser- get "/", PageController, :home+ live "/", GameLive end # Other scopes may use custom stacks. # scope "/api", ActivityDemoWeb do # pipe_through :api # end end
After launching the activity, you should see the newly created landing screen displaying the game ID:
If you stop the activity and launch it again, you’ll see a different game ID.
Tip
If you want to get rid of the Phoenix header, you’ll need to edit app.html.heex layout file, as it is automatically included in every template. This can be addressed in 2 ways:
Remove unwanted HTML from app.html.heex and add markup specific to your app branding.
Disable automatic inclusion of this layout in the activity_demo_web.ex file. This can be done by removing the following line:
def live_view do quote do+ use Phoenix.LiveView- use Phoenix.LiveView,- layout: {ActivityDemoWeb.Layouts, :app} unquote(html_helpers()) end end
I won’t personally do any of those as this activity is only meant as a demo on how to setup the project and not an actual game / app.
Great, now that we have a working LiveView mounted inside the Activity iframe, it’s time to finally start integrating the Discord’s SDK via the Phoenix hook defined earlier. Remember the Discord credentials stored earlier? Now’s the time to find them and integrate them into the app.
Before we can invoke the DiscordAuth hook it’s required to first get the Client ID and pass it as a data element.
const clientId = this.el.dataset["clientId"];
This code reads the data-client-id property of the element with mounted hook and uses it to initialize the Discord SDK.
To make everything nice and organized let’s create a module for handling all things Discord related. This will make life easier later on when implementing calls to the Discord API.
Let’s create a module name DiscordIntegration in the lib/activity_demo folder. For now, it will be enough to provide a single function for obtaining Discord client ID. As previously mentioned, storing variables in the source code directly is a really bad idea. Therefore I’ll use ENV variables to store them, which can be obtained by calling Elixir’s built-in System module. There are other ways of handling secrets, but this one will be good enough.
The minimal version of the module might look something like this:
defmodule ActivityDemo.DiscordIntegration do @spec client_id() :: binary() def client_id(), do: System.get_env("DISCORD_CLIENT_ID") || raise("The DISCORD_CLIENT_ID variable is not set!")end
Next, let’s add a conditionally rendered section to the LiveView which will trigger the hook and pass the client ID down to the hook via data-client-id property. But before we do that, it’s a good idea to move the HTML from the elixir itself to a separate .heex file.
Luckily, this is super easy with LiveView at it already has support for loading files with the same name if the render/1 function is not implemented within the module.
Create a new game_live.html.heex file in the lib/activity_demo_web/live folder and add the following content:
<h1>Hello world</h1><h2>You're connected to game {@game_id}</h2><p>Now rendered from the HEEX file!</p>
After that, remove the render function defined in GameLive module:
defmodule ActivityDemoWeb.GameLive do use ActivityDemoWeb, :live_view def mount(%{"launch_id" => game_id}, _session, socket) do socket = socket |> assign(:player, nil) |> assign(:game_id, game_id) {:ok, socket} end- def render(assigns) do- ~H"""- <h1>Hello world</h1>- <h2>You're connected to game {@game_id}</h2>- """- end end
After launching the activity you should be able to see the newly added paragraph. In order to prompt the user to sign in and later receive the auth code, add a conditionally rendered div with the DiscordAuth hook as follows. The div will be visible for as long as the player variable is nil, so it’s a good idea to indicate this to the user by adding a placeholder text like “Signing you in…“.
<h1>Hello world</h1><h2>You're connected to game {@game_id}</h2><p>Now rendered from the HEEX file!</p><div :if={is_nil(@player)} id="discord-auth-wrapper" phx-hook="DiscordAuth" data-client-id={ActivityDemo.DiscordIntegration.client_id()}> <p>Signing you in...</p></div>
After saving the file, you’ll notice that the LiveView process has crashed:
The DISCORD_CLIENT_SECRET variable is never used for now, but we’ll be using it later when performing Discord API calls so this saves you another restart in the future.
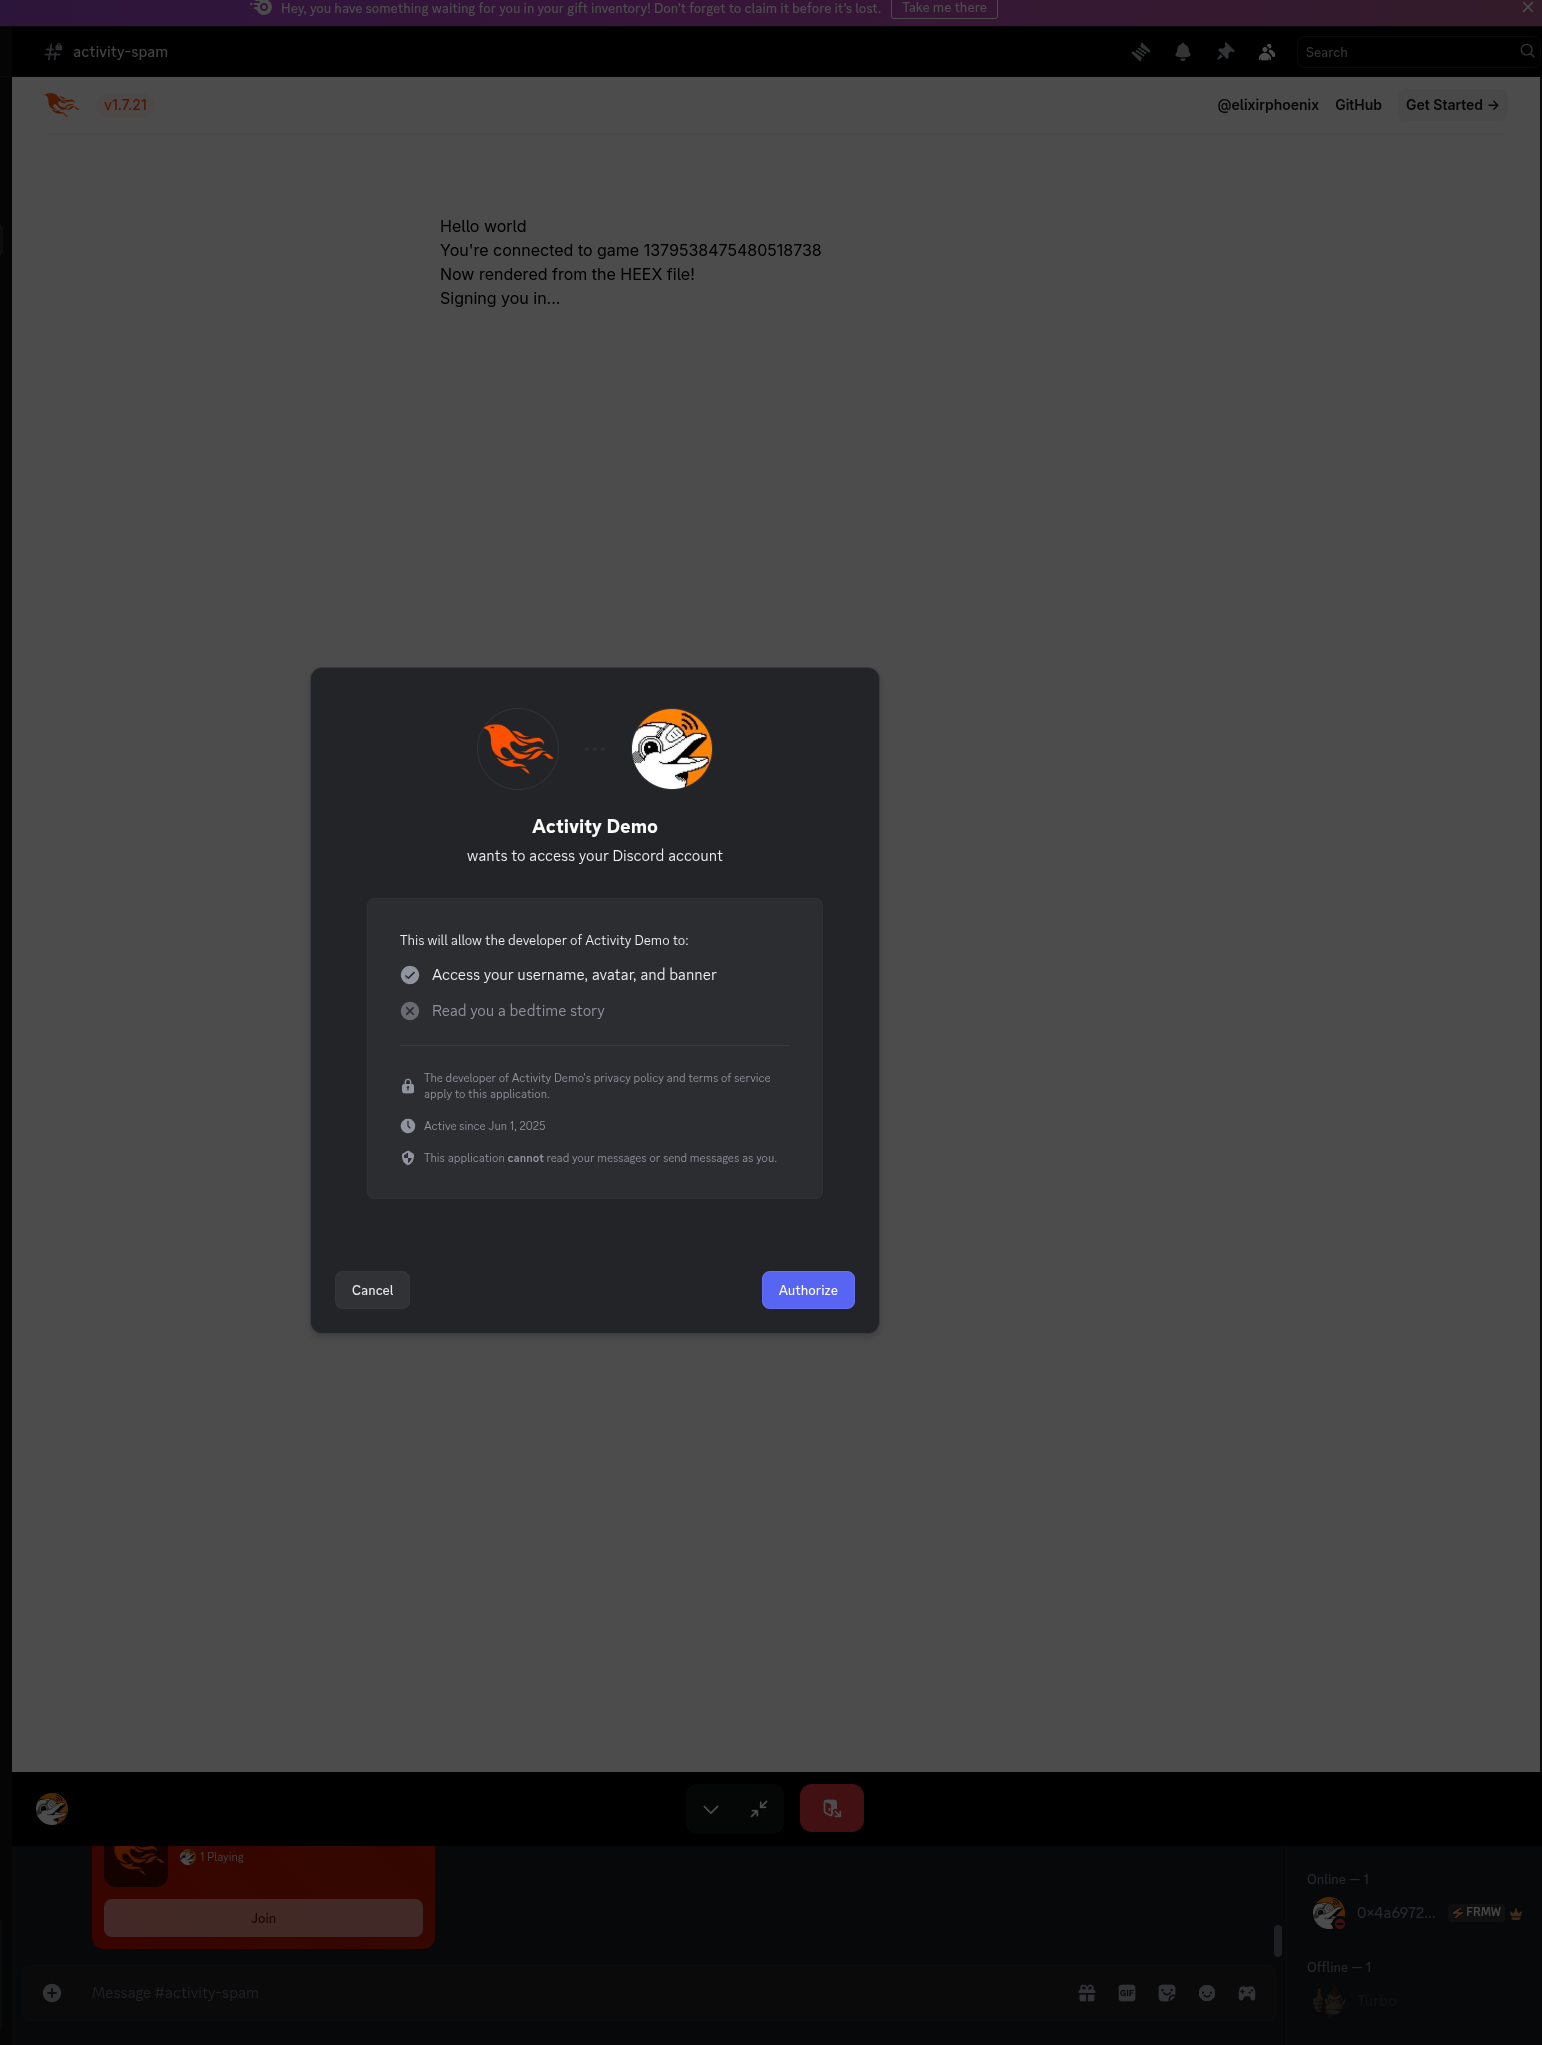
After restarting the application and launching the activity, you should see a propmt to sign into the application. Hurray, the Discord SDK integration is working as intended!
After clicking authorize, Discord will perform the whole RPC call roundtrip and you should see another crash in the terminal. This is because the Auth was successful and the login_with_auth_code was emitted by the hook. The problem is, that there is no handle_event defined for this error and therefore the function call fails.
To fix this, add an appropriate handle_event function to the GameLive module. You can use pattern matching to bind the passed auth_code param into a variable. After receiving the auth code we need to get an access token and user info from Discord.
For now, let’s just log the received auth code and return the socket without any additional assigns:
def handle_event("login_with_auth_code", %{"auth_code" => code}, socket) do dbg(code) {:noreply, socket}end
Retrieving user info from Discord API
To make requests to the Discord API it will be required to install req. Req is a wonderful library for sending HTTP requests created by Wojtek Mach. To install the library, add it as a dependency to mix.exs:
After adding it to mix.exs run mix deps.get and mix deps.compile to fetch the specified library version and compile it.
Now it’s time to extend the DiscordIntegration module created earlier in order to first fetch the authenticated user’s access token, which can be then used to retrieve information about the user and assign it to the LiveView player variable in the LiveView process.
But first, it’s a good idea to define a simple struct for storing the player (user) data. Create a lib/activity_demo/player.ex file with the following content:
This will hold the user ID, name and avatar so that it can be used later on.
To update the DiscordIntegration, it’s required to add the following:
Function for retrieving Discord client secret from the DISCORD_CLIENT_SECRET variable.
Function for calling the https://discord.com/api/oauth2/token endpoint in order to receive user’s access_token.
Function for calling the /api/v10/users/@me endpoint to get user’s data
And finally a function to map the retrieved user info into the previously created Player struct
defmodule ActivityDemo.DiscordIntegration do alias ActivityDemo.Player @spec client_id() :: String.t() def client_id(), do: System.get_env("DISCORD_CLIENT_ID") || raise("The DISCORD_CLIENT_ID variable is not set!") @spec client_secret() :: String.t() defp client_secret(), do: System.get_env("DISCORD_CLIENT_SECRET") || raise("The DISCORD_CLIENT_SECRET variable is not set!") @spec create_player_from_auth_code(String.t()) :: {:ok, Player.t()} | {:error, reason :: String.t()} def create_player_from_auth_code(auth_code) do with {:ok, access_token} <- fetch_access_token(auth_code), {:ok, user_info} <- fetch_user_info(access_token) do {:ok, map_user_info(user_info)} end end @spec fetch_access_token(String.t()) :: {:ok, binary()} | {:error, binary()} defp fetch_access_token(auth_code) do body = [ client_id: client_id(), client_secret: client_secret(), grant_type: "authorization_code", code: auth_code ] with {:ok, %Req.Response{status: 200} = response} <- Req.post("https://discord.com/api/oauth2/token", form: body) do {:ok, response.body["access_token"]} else _ -> {:error, "Error fetching access token "} end end @spec fetch_user_info(String.t()) :: {:ok, map()} | {:error, term()} defp fetch_user_info(access_token) do with {:ok, %Req.Response{status: 200} = response} <- Req.get("https://discord.com/api/v10/users/@me", auth: {:bearer, access_token}) do {:ok, response.body} else _ -> {:error, "Error fetching user info"} end end @spec map_user_info(map()) :: Player.t() defp map_user_info(user_info) do id = user_info["id"] name = user_info["global_name"] || user_info["username"] avatar = case user_info["avatar"] do nil -> "https://cdn.discordapp.com/embed/avatars/1.png" hash -> "https://cdn.discordapp.com/avatars/#{id}/#{hash}.png" end %Player{ id: id, name: name, avatar: avatar } endend
The code is pretty straightforward, but I still think there are few things worth mentioning:
First is the form body in the fetch_access_token function. it’s a keyword list with client credentials, the provided auth code and grant type set to authorization_code. This tells Discord that we want to authorize our app to access the user’s data and we provide the code returned by the AUTHORIZE RPC call as a “proof” that the user authorized this data exchange.
The form: keyword instructs Req to automatically set Content-Type header to application/x-www-form-urlencoded and automatically encodes the provided keyword list as URL parameters.
After the request is sent, we pattern match on the response expecting a HTTP 200 OK status code. If the status code is matched, the access_token value is returned from the parsed JSON response.
When the access_token is available to the application it can be used within Bearer token authentication to fetch the user’s data.
Once again, a HTTP 200 OK response is expected and matched in the with statement.
Finally, the fetched data is mapped into the previously defined Player struct. There are 2 things to watch out for in the mapping. First is the user’s name. Every Discord account has a unique username stored in the username field, however you can set a global display name in the settings, however that’s optional. So the logic prefers the user’s display name and the username is only used as a fallback. The second thing is the user’s avatar. Discord uses so-called avatar hashes to allow applications to request various formats and sizes of the avatar. If the avatar hash is not set, a default one is used. You can read more about Discord’s CDN endpoints in the developer documentation.
Putting it all together
The last thing remaining is to connect the game LiveView login_with_auth_code event handler to our newly created DiscordIntegration.create_player_from_auth_code/1 function!
Replace the placeholder event handler implementation with the following and you’re good to go.
def handle_event("login_with_auth_code", %{"auth_code" => code}, socket) do with {:ok, player} <- DiscordIntegration.create_player_from_auth_code(code) do {:noreply, assign(socket, :player, player)} else {:error, reason} -> Logger.error("Error when handling Discord auth code: #{reason}") {:noreply, socket} endend
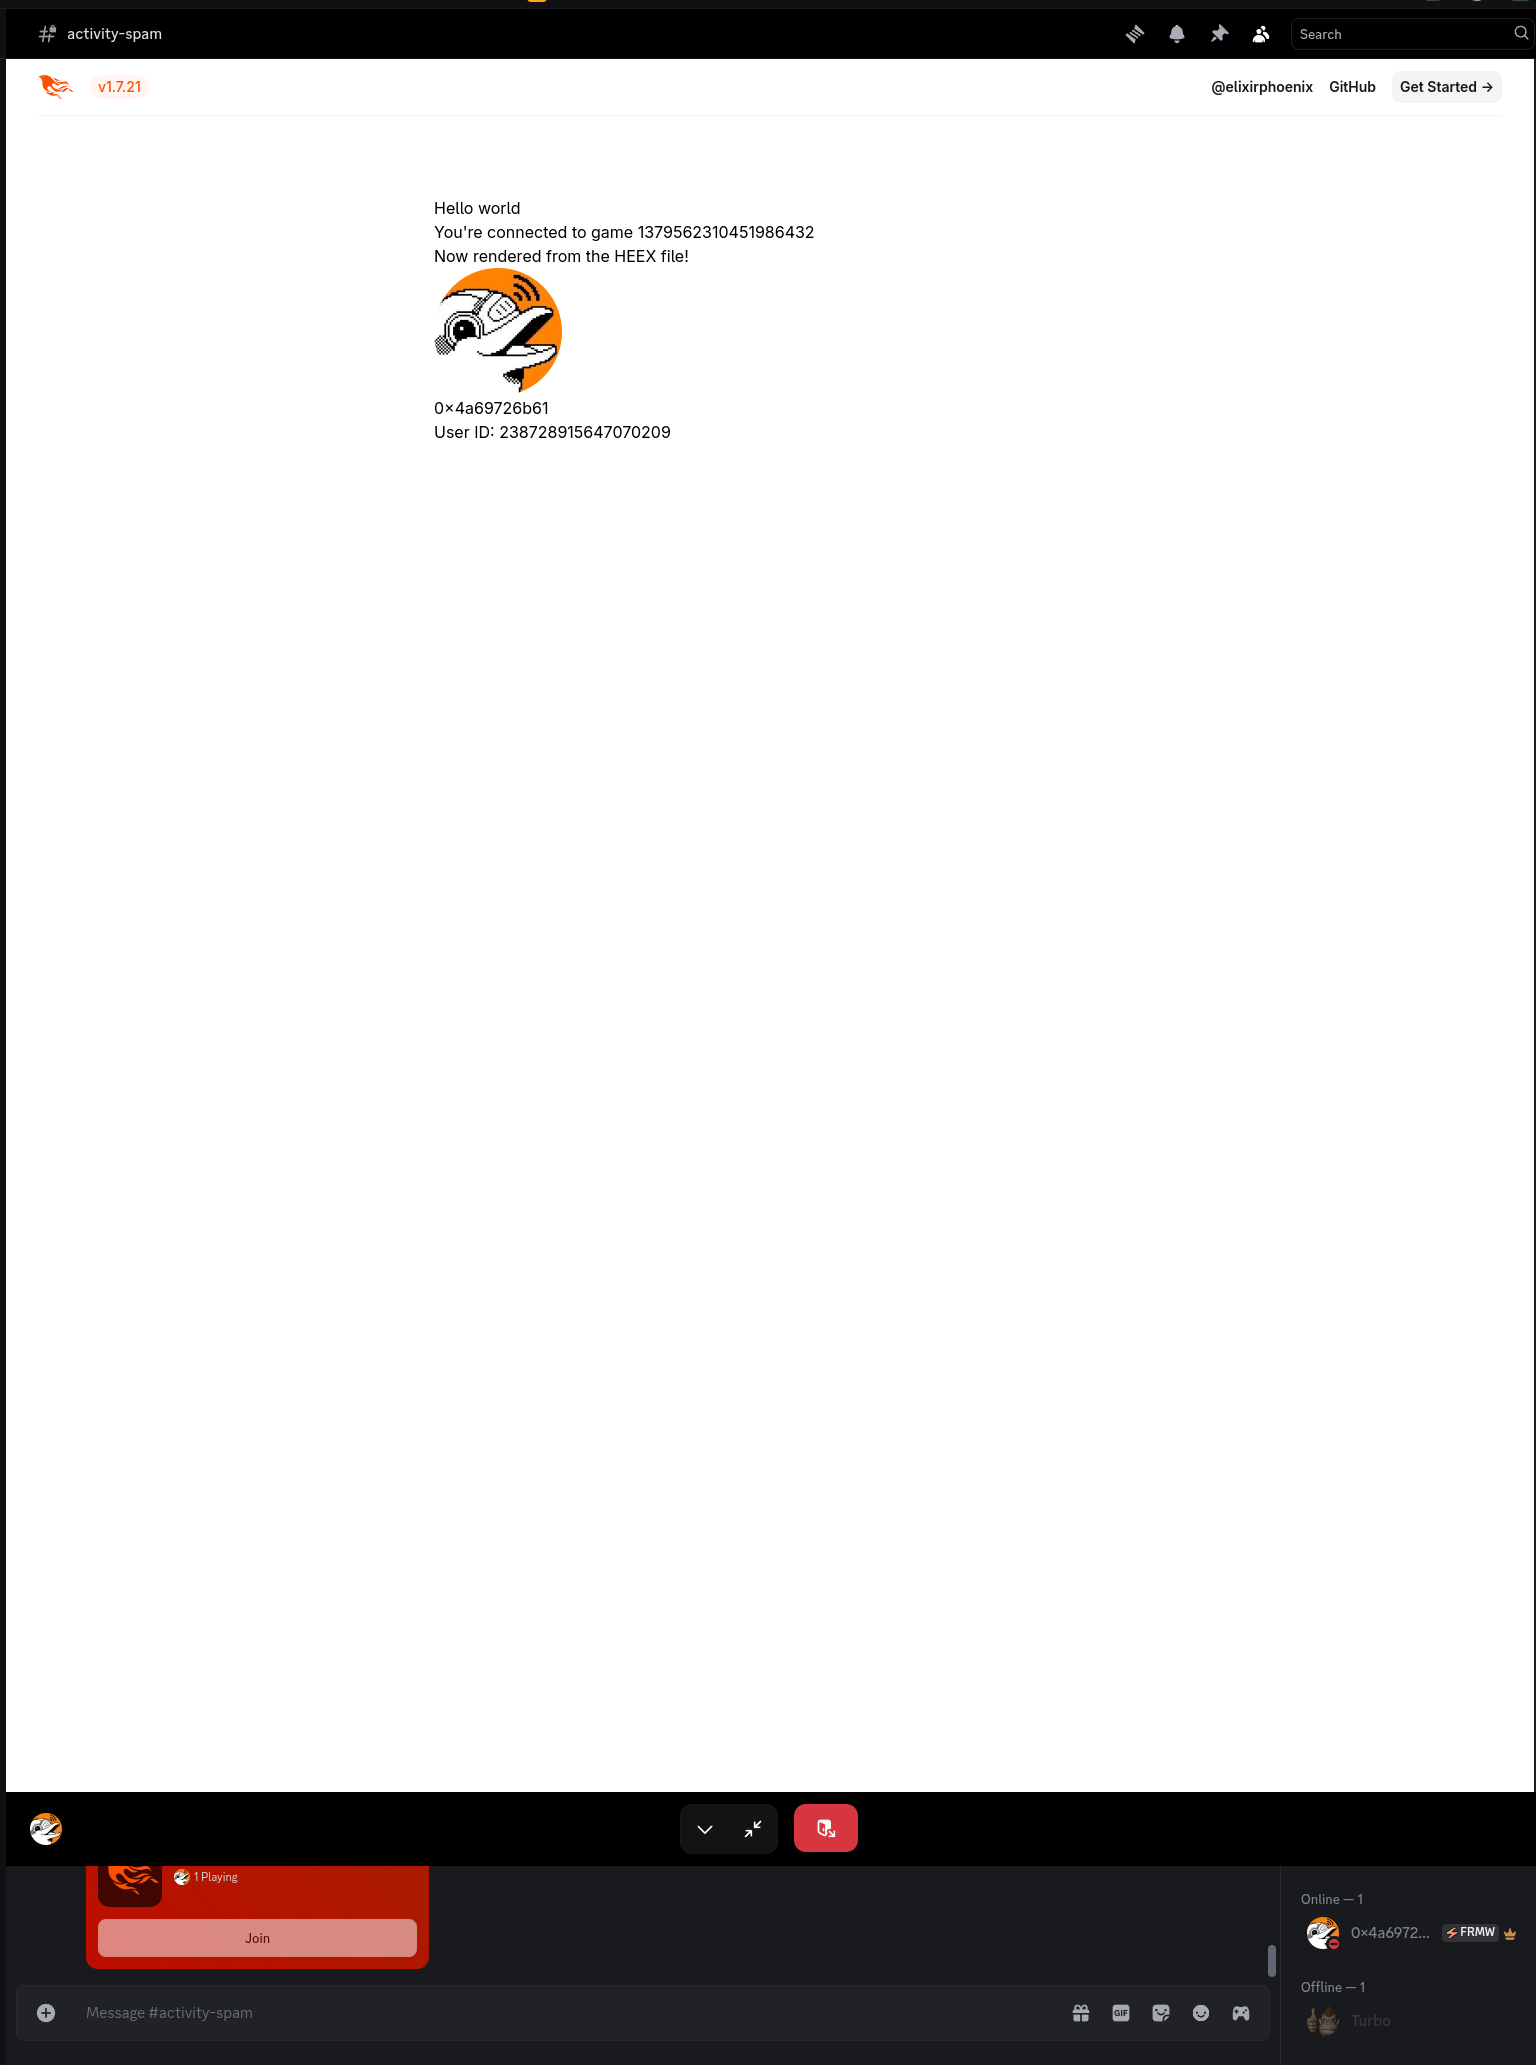
Finally, we’ll edit the game_live.html.heex template a bit to display the player info when not nil:
And after confirming the sign in in the activity, you can see your profile picture, username and Discord ID in the LiveView!
A few words to conclude the article
There are many more things I would like to write here, but the article is already extremely lengthy, so I will just provide a summary with points on how to extend the activity further. Maybe some day I will write a part 2 of this article, guiding you through the entire development cycle, ending with a finished, playable game.
Summary
What this article guided you through:
Creating and setting up the Discord application in the Discord developer portal
Making Phoenix work with Discord’s sandboxed iframe environment
Configuring a LiveView hook for working with Discord’s embedded app SDK
Authenticating user using the Discord API and assigning the user back to LiveView data
Here’s a few extension points that you can use to build upon the foundation described in the article:
PubSub - when mounting the LiveView you can subscribe to a game topic using Phoenix PubSub and receive updates when the game changes.
Visuals - this article completely ignored any visuals, you can use Tailwind, Phoenix’s JS commands and other techniques to give your activity a good look. Also consider how the game will look on mobile, as many users use Discord only on mobile devices.
Tip
You can find a more complete Discord activity code in the jirkavrba/six-discord Github repository.
Get in touch
I hope you’ve learned something new today and that this article has helped you with starting your own Discord activity and I will be more than happy to see what you’ve built.
If you have any feedback / questions feel free to reach out to me at Discord, Github or via email.
Thanks for reading and have a lovely rest of the day ❤️.